Using Particle Collections
Collections are an important part of many Gantry 5 particles. They are essentially the line items, or sub-items within a particle. For example, in the Social particle a collection is used to organize different social links within the particle. This enables you to easily create or remove specific social items, reorder them as you please, and to keep them separate from the main settings that impact the particle as a whole, such as the particle's main title, sub-title, etc.
Using Collections in the Administrator
Collections are made to be configured in the Gantry administrator. If you are configuring a collection in an existing particle, or you have already set up your collection's options in the YAML file for your custom/customized particle, then you should see something similar to the particle settings shown below.
-
 1234
1234
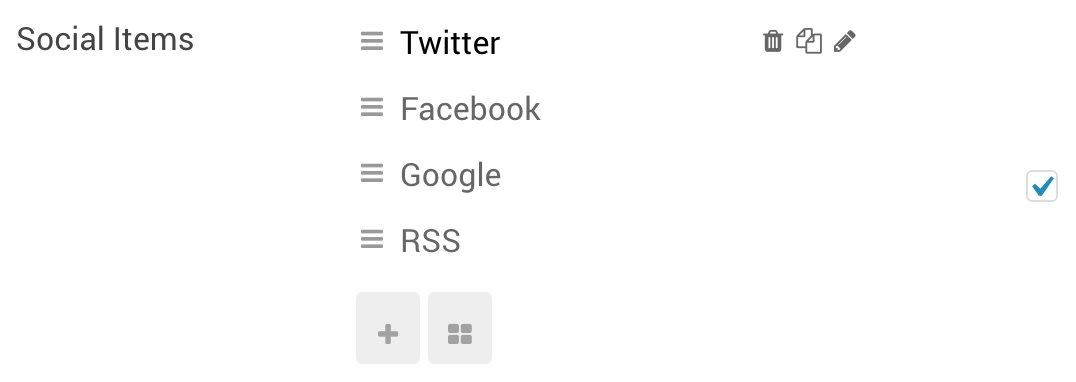
This example is the default Social particle as configured in the Hydrogen theme. You will notice there are top-level fields including CSS Classes, Title, and Target which affect the entire particle. However, you will also notice the Social Items area of the settings which includes different specific items that will be displayed on the front end.
These sub-items contain options that enable you to configure them and give them unique settings from one-another. You can add new items to the collection using the plus + icon, as well as edit them all in one pop-up using the Edit All Items button.
-
 123
123
If you hover your cursor over a specific item, you will find access to Delete, Duplicate, and Change Name options. These enable you to remove a specific item, duplicate it and use the duplicate as a base for a new item, and change the item's name which (depending on how the particle is configured) may be reflected on the front end or used to help you to better organize items in the back end.

Clicking the item's name will open a new popup with the item's settings. These settings will change how that specific item appears, the content it contains, and any options you wish to configure.
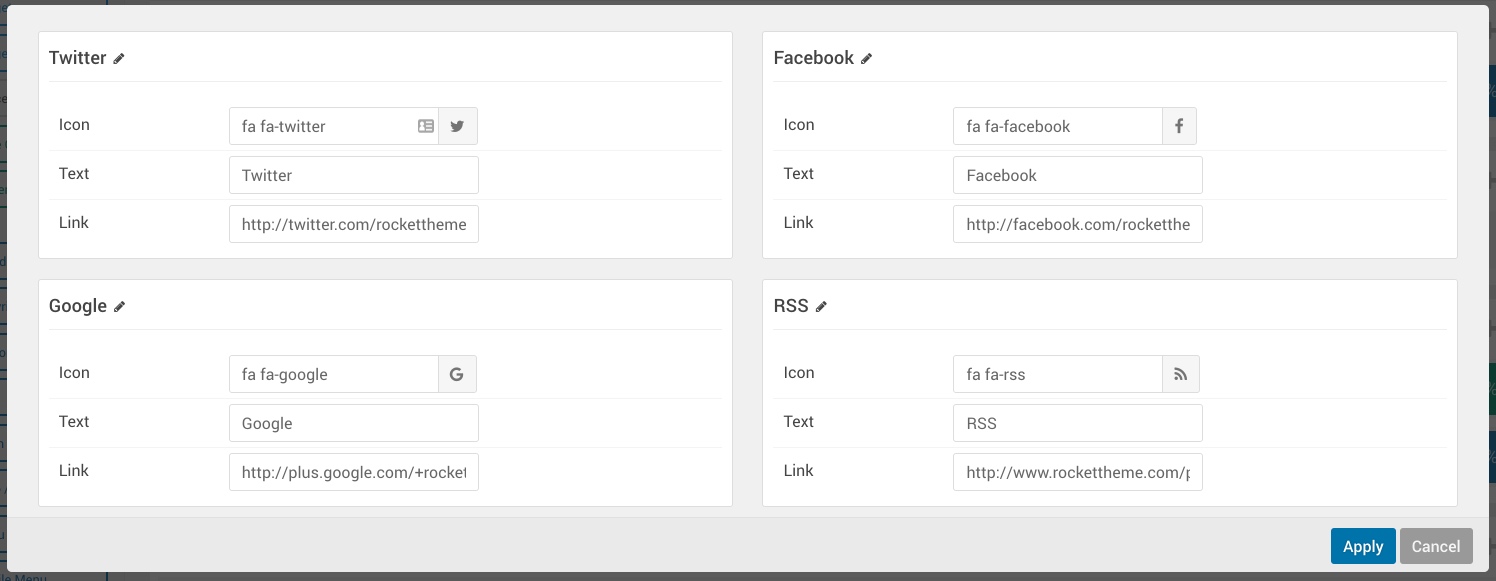
Selecting the Edit All Items option opens a popup with all of the items and their settings at one time. It's a great tool for people that are configuring multiple items at once and want to save time.
Configuring Collections in YAML
In order for a collection to be enabled in a particle, it needs to first be set up in the particle's YAML file.
In general, to create a collection you will want to declare a collection.list item type, label that item, and set up the fields that will appear for each item in your collection.
Here is an example of how a collection would look in the YAML file. This example is the default Social particle which is imaged in the above section so you can see how the YAML fields established here appear in the back end.
items:
  type: collection.list
  array: true
  label: Social Items
  description: Create each social item to display.
  value: name
  ajax: true

  fields:

    .name:
      type: input.text
      label: Name
      skip: true

    .icon:
      type: input.icon
      label: Icon

    .text:
      type: input.text
      label: Text

    .link:
      type: input.text
      label: Link
Here is a breakdown of the yaml items and what they mean to the particle.
| Item | Description |
|---|---|
| type | Setting the type to collection.list tells Gantry that this area of the particle's settings is going to be a collection. You can also use type to define the types of fields you're setting up for the collection items. |
| array | This is an internal command needed by collection field type. Always keep this line set to true. |
| label | The label sets the name of the collection as it appears in the back end. |
| description | A collection's description gives it descriptive text appearing as you hover the cursor over its label. |
| value | This sets which field to use as the name of the collection item in the settings panel. For example: this could be name, icon, or text. |
| ajax | This field tells Gantry how to display the collection. We recommend always setting this to true. Not setting it to true displays all the items inline, rather than in an organized list of titles. |
| fields | This part of the YAML file introduces the fields that will appear in individual collection items' settings. |
Another important note here is that any field you want inside the fields portion of the collection needs to start with a period (.). So instead of calling the field test it would be .test.
You can find more information about how to use YAML files in Gantry 5 in our guide.