Adding New PHP Functions
Adding your own PHP functions to a Gantry theme is achievable, and can be a very simple process thanks to DI (Dependency Injection). This guide will take you through the steps needed to add your own PHP functions to your site.
In this example, we will be adding Mobile Detect, an open source PHP class that detects mobile devices (including tablets) enabling you to create device-specific responses on your site.
If you are developing your own themes from scratch, this is a great method to accomplish this task. This process is not expected to become the standard solution in the long term for users of existing themes. Overriding the theme.php on an existing theme might cause issues when upgrading. A cleaner, more intuitive process for extending PHP functionality is in the works and this document will be updated when it becomes available.
Overriding the theme.php File
The includes/theme.php file defines the theme. It can also be used to add additional PHP functions.
At this moment it is not possible to override the theme.php. When the functionality will become available, you will be able to create an override of this file under the custom/includes/ directory, in order to make your changes and have them preserved in the event that the theme is updated.
Since this is not yet possible, you will need to edit directly the theme.php located under includes/ at the root of the theme. It is advised that you create a copy of the file in case you need to revert back to its original state.
Preparing to Use Mobile Detect
To add the Mobile Detect php function, we first need to download the library. You can grab the latest stable version of Mobile_Detect.php from GitHub and place it under the custom/includes/ folder.
Your theme folder should now look like this:
+ g5_hydrogen
  + includes
    + theme.php
  + custom
    + includes
      - Mobile_Detect.php
Now you are ready to inject Mobile_Detect into gantry by editing the theme.php file and adding the following simple lines of code at the bottom of the file:
// Require the Mobile Detect library
include_once dirname(__FILE__).'/../custom/includes/Mobile_Detect.php';

// Dependency Injection of Mobile Detect
$gantry['mobile_detect'] = new \Mobile_Detect();
This will make the Mobile Detect library available to the twig files via the gantry.mobile_detect call. Any method that Mobile Detect provides is now available to you.
Putting the Class to Use
Once you have the class injected, you will be able to reference it from any of the theme's Twig files. This includes core Twig files for the theme, individual particles, etc.
Here is an example of a call that puts Mobile Detect to use.
{%- if not gantry.mobile_detect.isMobile() -%}
    THIS DEVICE IS NOT A MOBILE
{%- endif -%}
Real World Example
Let's create a simple new Mobile Detect particle and put together all we've learned.
More details on how to create a new particle can be found in the dedicated section Creating a New Particle.
The first step is to create the required YAML and Twig files for this new particle. You can do so by creating a new folder custom/particles (if not there already) and by adding two new files: mobile_detect.html.twig and mobile_detect.yaml.
+ g5_hydrogen
  + custom
    + particles
      - mobile_detect.html.twig
      - mobile_detect.yaml
For the sake of the example, the particle is going to be an extremely simple one and this is the content we will use for its files:
mobile_detect.html.twig
{% extends '@nucleus/partials/particle.html.twig' %}

{% block particle %}
    <div>You are using Mobile Detect v<strong>{{ gantry.mobile_detect.getScriptVersion() }}</strong></div>
    <div>
        {% set device = (gantry.mobile_detect.isMobile() ? (gantry.mobile_detect.isTablet() ? 'tablet' : 'phone') : 'computer') %}
        Your device is a <strong>{{ device }}</strong>
    </div>
    <p>
        {% for name, match in gantry.mobile_detect.getProperties() %}
            {% set check = gantry.mobile_detect.version(name) %}
            {% if check != false %}
                <div>version(<strong>{{ name }}</strong>) => <strong>{{ check }}</strong></div>
            {% endif %}

        {% endfor %}
    </p>
    <div>
        {{ gantry.mobile_detect.is('chrome') }}
    </div>
    <div>Your User Agent is: <pre>{{ gantry.mobile_detect.getUserAgent() }}</pre></div>
{% endblock %}
mobile_detect.yaml
name: Mobile Detect
description: Example Particle
type: particle
At this point, the Mobile Detect particle is going to show up in Gantry 5 administrator. You can now drag and drop the particle anywhere you like in the Layout Manager and after having saved you will see Mobile Detect being used.
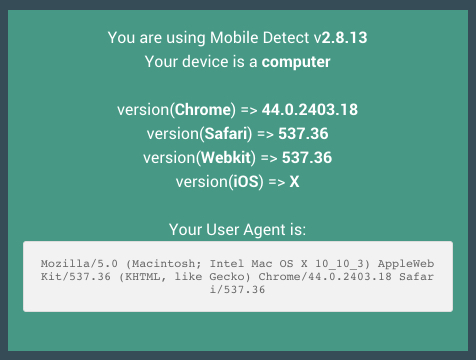
Refresh the front end, and you will see something like this: