Creating a New Particle
Creating a new Particle in Gantry 5 is a pretty straightforward process. You will need a text editor, as you will be creating two files for the Particle.
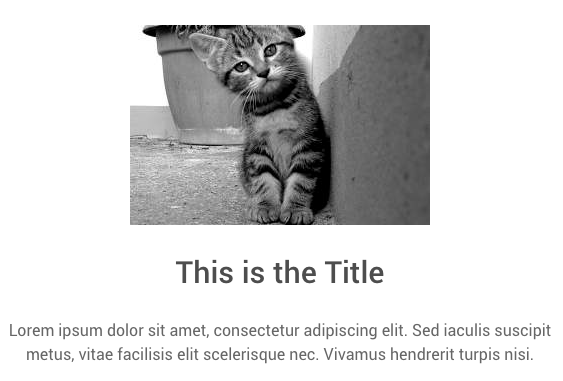
For the interest of this guide, we will create a simple Particle for a page on a site. This Particle consists of three main parts. The Title, Image, and Description. Particles can be as simple or complex as you need them to be.
When creating your file names, you should avoid special characters such as hyphens.
Creating the YAML File
While creating your Particle, it may be easier to start with the YAML file as this acts as the blueprint for the particle. The Twig file uses this YAML file to pull information, settings, and find out which fields are being used in the administrator for variables.
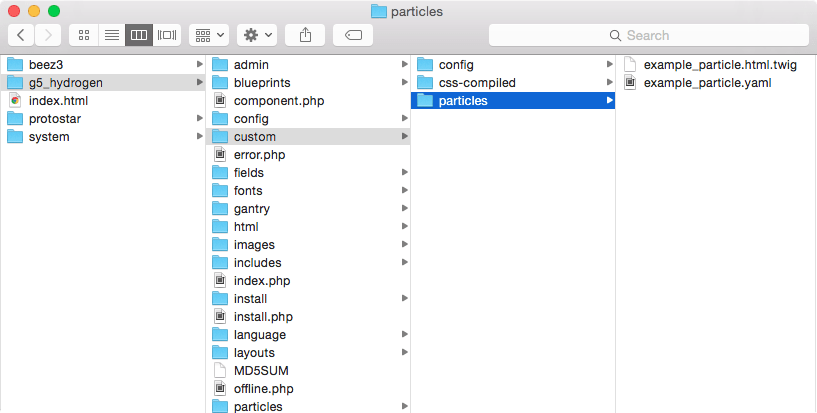
You will want to create this file in your template's folder structure by navigating to TEMPLATE_DIR/custom/particles and creating a file with a name like example_particle.yaml. You can replace example_particle with anything you would like. This just happens to be the name we're using for this particular particle. This file name will be referred to later on.
You will want to create this file in your template's folder structure by navigating to THEME_DIR/custom/particles and creating a file with a name like example_particle.yaml. You can replace example_particle with anything you would like. This just happens to be the name we're using for this particular particle. This file name will be referred to later on.
You will want to create this file in your template's folder structure by navigating to user/data/gantry5/themes/THEME_DIR/particles and creating a file with a name like example_particle.yaml. You can replace example_particle with anything you would like. This just happens to be the name we're using for this particular particle. This file name will be referred to later on.
Here is the body of our example Particle's YAML file:
name: Example
description: Displays a Title, Image, and Text on the front end.
type: particle

form:
  fields:
    enabled:
      type: input.checkbox
      label: Enabled
      description: Globally enable to the particles.
      default: true

    title:
      type: input.text
      label: Title
      description: Customize the section title text.

    image:
      type: input.imagepicker
      label: Image
      description: Select the main image.

    description:
      type: textarea.textarea
      label: Text / HTML
      description: Create or modify your description.

    css.class:
      type: input.text
      label: Class
      description: CSS class name for the particle.
This YAML is made up of two main parts. First, the head of the file which sets the Name, Description, and Type. The Name is what appears in the administrator as the title of the Particle in the Particle Defaults and Layout Manager panels. The Type being Particle tells Gantry that this YAML file is being used to create a Particle.
The Type setting tells Gantry5 if this Particle is a standard Particle, Atom, or Position. You will likely not be creating positions as there is already a configurable Module Position Particle in place, but in cases where you are creating an Atom the line would read, type: atom.
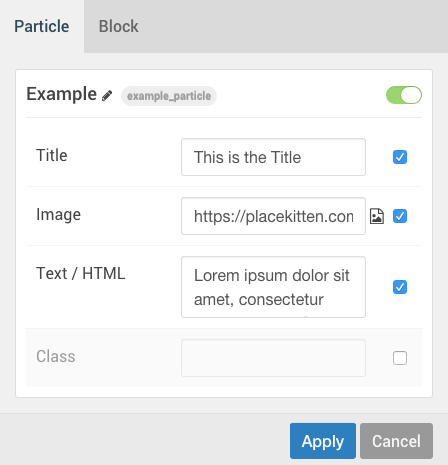
The second section sets the forms/fields that appear in the administrator, as well as the default settings. These fields are what appear in the administrator and are accessible to your site managers. They give them the ability to do things like set custom text, titles, and toggle settings.
The first field block (enabled) is required. It tells Gantry to put a switch on the back end that makes it possible to enable/disable the Particle.
The rest of the fields here, title, image, description, and css.class provide fields site managers can use to configure the Particle without having to edit any files manually.
Here is a breakdown of the settings used in the example above and how they affect the file:
| Setting | Description |
|---|---|
| Type | Sets the type of field. This determines if your user will see a text field, checkbox, toggle, or some other input type. |
| Label | This label appears on the back end next to the field, letting the user know what it is/does. |
| Description | This field sets the tooltip that appears on hover over the Label. It's meant as a reminder for the user. |
| Default | This sets the default that appears in the field. If it's a text field, you would enter text. If it's a checkbox, you would set it as true or false. |
Creating the Twig File
The next file you will need to create will sit in the same directory as the YAML file. We recommend naming it the same way as you did the YAML file, but in the (name.html.twig) format. Ending the file name with html.twig tells Gantry that this is a Twig file, which is basically the template of the file. It controls how Particles are rendered, states the HTML, and determines how variables defined in the YAML are used.
Here is the content of the example_particle.html.twig file:
{% extends '@nucleus/partials/particle.html.twig' %}

{% block particle %}
<div class="example_particle {{ particle.css.class }}">
    <div align="center">
        <img src="{{ url(particle.image) }}" alt="image">
        <h2>{{ particle.title }}</h2>
        <p>{{ particle.description }}</p>
    </div>
</div>
{% endblock %}
This is a very basic example of a Twig file, containing three parts.
The first part ({% extends '@nucleus/partials/particle.html.twig' %}) defines the Twig file as being for a Particle. This is a must-have element for all Particle Twig files.
The second part is the Block wrapper. {% block particle %} and {% endblock %} surround the block that contains the Particle. This is also a required component as your Particle will not render correctly without it.
The third part is the meat and potatoes of the Particle. This is the body used to determine how a Particle will look and uses the information set in the YAML. In our example, we set the div class to example_particle. This class tells Gantry that this Twig file is working with information from the custom_html.yaml companion file.
The CSS class field used in this example is not required. A CSS can be applied at the Block level within the Gantry 5 administrator. Adding a class field here enables you to assign a CSS class to a specific div within the Particle.
The bits that are placed between curly brackets such as {{ particle.title|e }} pull information from the fields set in the YAML and insert them into the Twig for rendering on the front end.
The |e that appears after the Particle field name in our example is a Twig filter. You can find a list of filters here.
Once you have created these files, you should see the Particle appear in the Particle Defaults and Layout Manager administrative panels in the Gantry 5 administrator.
Pulling Gantry Configuration Data Using Twig
One of the key components of Gantry is the ability to easily set up fields and options using YAML files that can then be used by users in the Gantry 5 administrator to configure the site.
The YAML file creates the field (or option), the user configures that option, defining the variable which you can then have used during page rendering through your Twig file.
Pulling a configuration variable is pretty easy. You just need to use the gantry.config.get() command to pull this data.
One example of this would be using the line {{ gantry.config.get('styles.base.background') }} to grab the currently-set base background color for the theme.
In our current example, we are pulling the configuration option for the current particle through commands like {{ particle.header }} which pulls the value set for the header field for this specific particle.
Let's say you wanted to pull the variable that is set on another particle. For example, the Branding particle. You can fetch this information using {{ gantry.config.get('particles.branding.css.class') }} which tells Gantry to pull the CSS Class value set in the Branding particle. Doing this will grab the default value, rather than a value set in an individual particle instance from the Layout Manager or Menu Editor.
Customizing an Existing Particle
If you want to override an existing Particle and make custom changes to the source of that Particle, you can do so by copying it to your TEMPLATE_DIR/custom directory and changing the duplicate file(s). These changes will override the existing Particle from Gantry's core, the platform, or the theme.
Here is a table to help you figure out where to place the duplicate YAML and Twig files.
| Original File Directory | Duplicate File Directory | Alternate Duplicate File Directory |
|---|---|---|
media/gantry5/engines/nucleus/particles |
TEMPLATE_DIR/custom/particles |
TEMPLATE_DIR/custom/engine/particles |
TEMPLATE_DIR/particles |
TEMPLATE_DIR/custom/particles |
If you want to override an existing Particle and make custom changes to the source of that Particle, you can do so by copying it to your THEME_DIR/custom directory and changing the duplicate file(s). These changes will override the existing Particle from Gantry's core, the platform, or the theme.
Here is a table to help you figure out where to place the duplicate YAML and Twig files.
| Original File Directory | Duplicate File Directory | Alternate Duplicate File Directory |
|---|---|---|
wp-content/plugins/gantry5/engines/nucleus/particles |
THEME_DIR/custom/particles |
THEME_DIR/custom/engine/particles |
THEME_DIR/particles |
THEME_DIR/custom/particles |
If you want to override an existing Particle and make custom changes to the source of that Particle, you can do so by copying it to your user/data/gantry5/themes/THEME_DIR/ directory and changing the duplicate file(s). These changes will override the existing Particle from Gantry's core, the platform, or the theme.
Here is a table to help you figure out where to place the duplicate YAML and Twig files.
| Original File Directory | Duplicate File Directory | Alternate Duplicate File Directory |
|---|---|---|
user/plugins/gantry5/engines/nucleus/particles |
user/data/gantry5/themes/THEME_DIR/particles |
THEME_DIR/custom/engine/particles |
THEME_DIR/particles |
user/data/gantry5/themes/THEME_DIR/particles |