Presets
Gantry makes use of a powerful Preset system that allows developers and site builders to create preset styles and configurations.
Creating a custom preset is a very simple task with Gantry. Check out this short video on how to customize your layout then create a custom preset based on your configuration options.
Gantry Presets are a combination of Gantry features and configuration settings which allow you to create predefined groupings for the entire template, as well as on a per-menu item basis. Presets can consist of any Gantry configuration option such css style, link color, background, body graphic levels, font settings, and much more.
Creating a new Preset
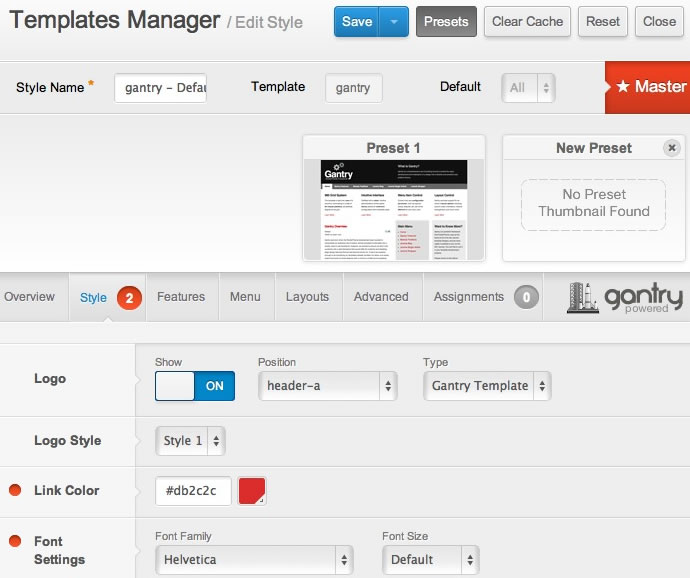
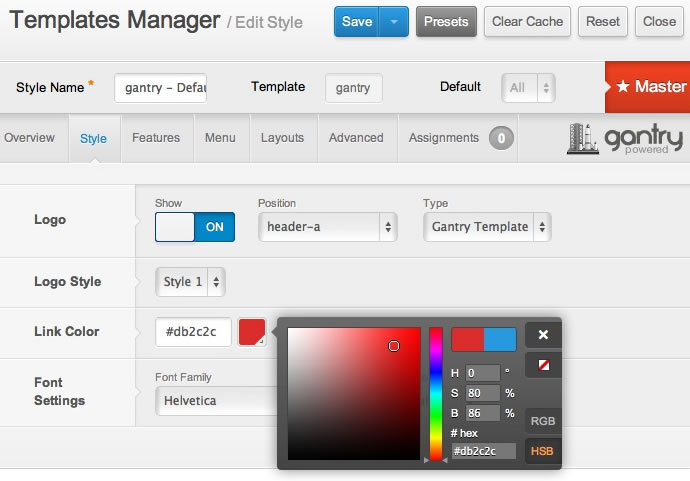
To configure a new preset, go to Extensions → Template Manager → gantry — Default (Master) → Style. Configure any style settings for the template such as Link Color.
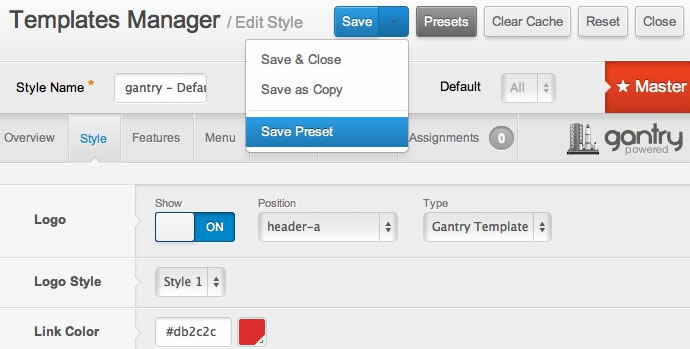
Once configured, click Save Preset from the Save button dropdown.
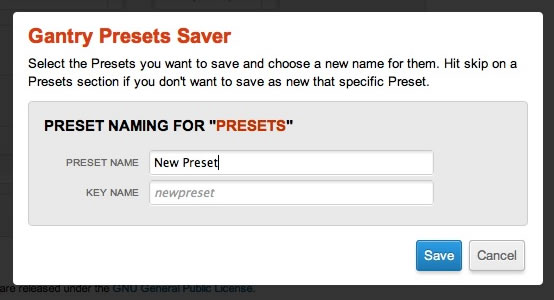
The Gantry Presets Saver modal dialog box will appear. Enter your Preset Name, and the Key Name will be generated automatically. Then click Save.

To configure a new preset, go to Admin Dashboard → Gantry Theme → Style. From here, you can configure style settings for the template. In the example below, we'll change the link color.

Once configured, click Save Preset from the Save button dropdown.

The Gantry Presets Saver modal dialog box will appear. Enter your Preset Name, and the Key Name will be generated automatically. Then click Save.
Select your new Preset
Click on the Presets button to display all available presets. Your new preset will display in the preset slider. Click on the preset to load your custom style settings. Select Save to load the preset.
After a preset is created, you can create a thumbnail image in the admin/presets/ folder with the filename structure keyname.png, where keyname is the Keyname from the modal dialog box.